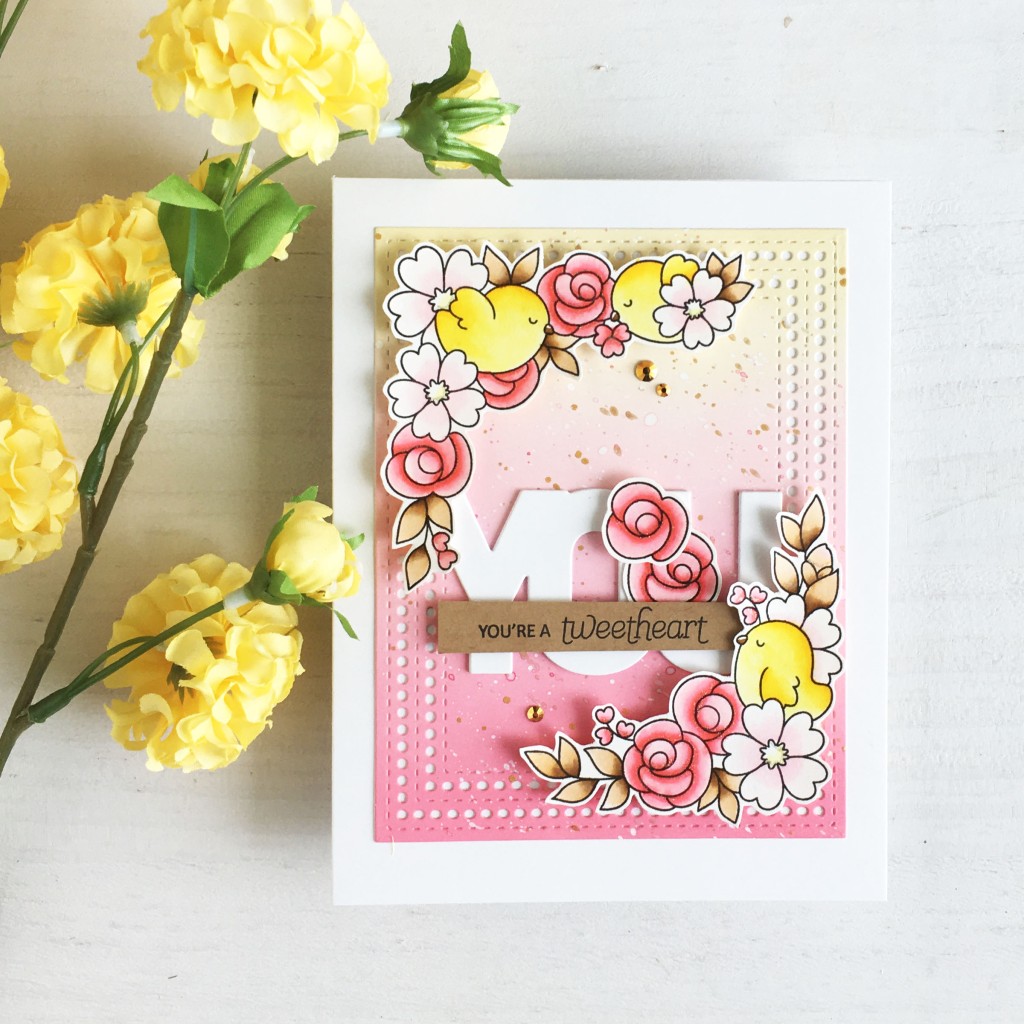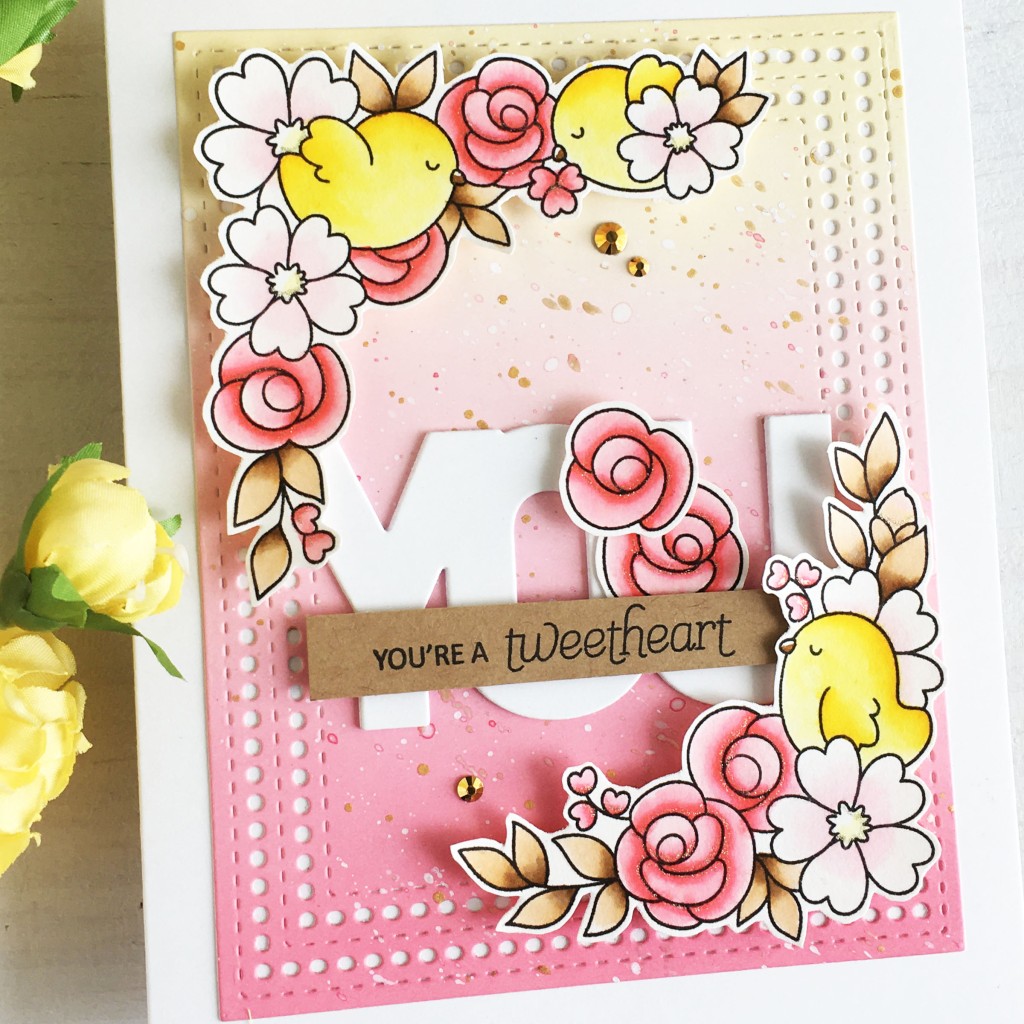
I am so happy to have you join me today as we showcase the new January release from Reverse Confetti with you! I hope you have been enjoying your hoping so far and I will have the full Blog Hop list below!
I used these Reverse Confetti products for my slimline design:
- Hello Daisy stamps & coordinating dies
- Valentine Sentiments stamps
- Layered Lots of Love dies
- Stitched Daisies Cover Panel die
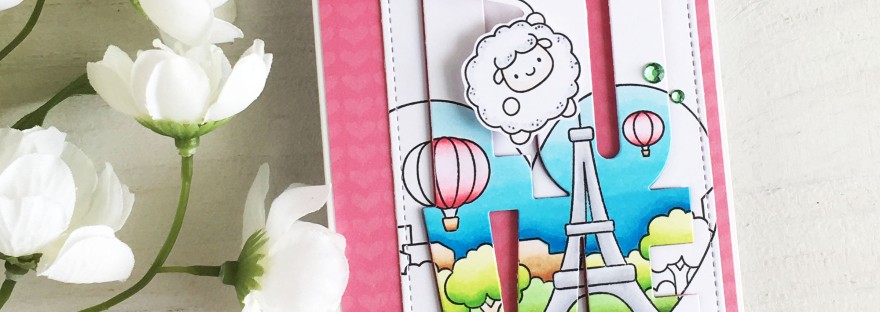
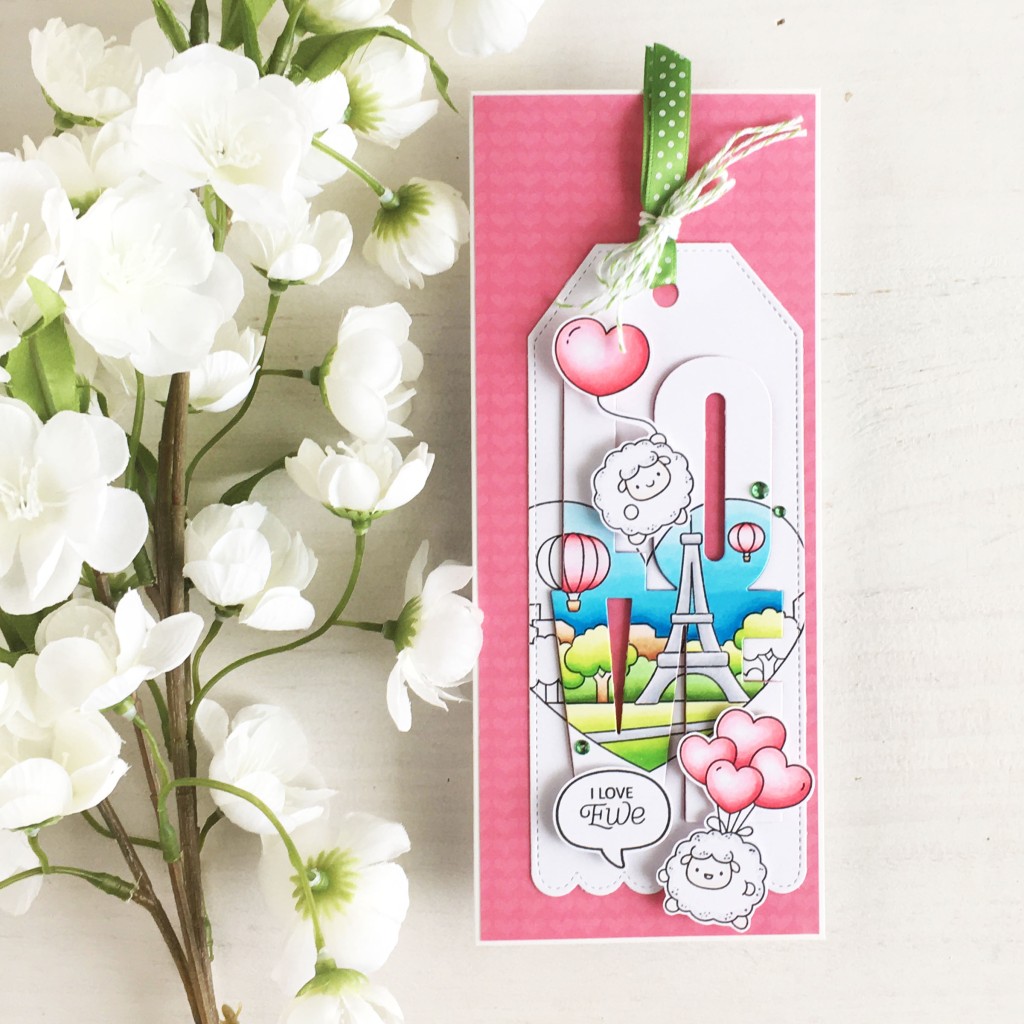
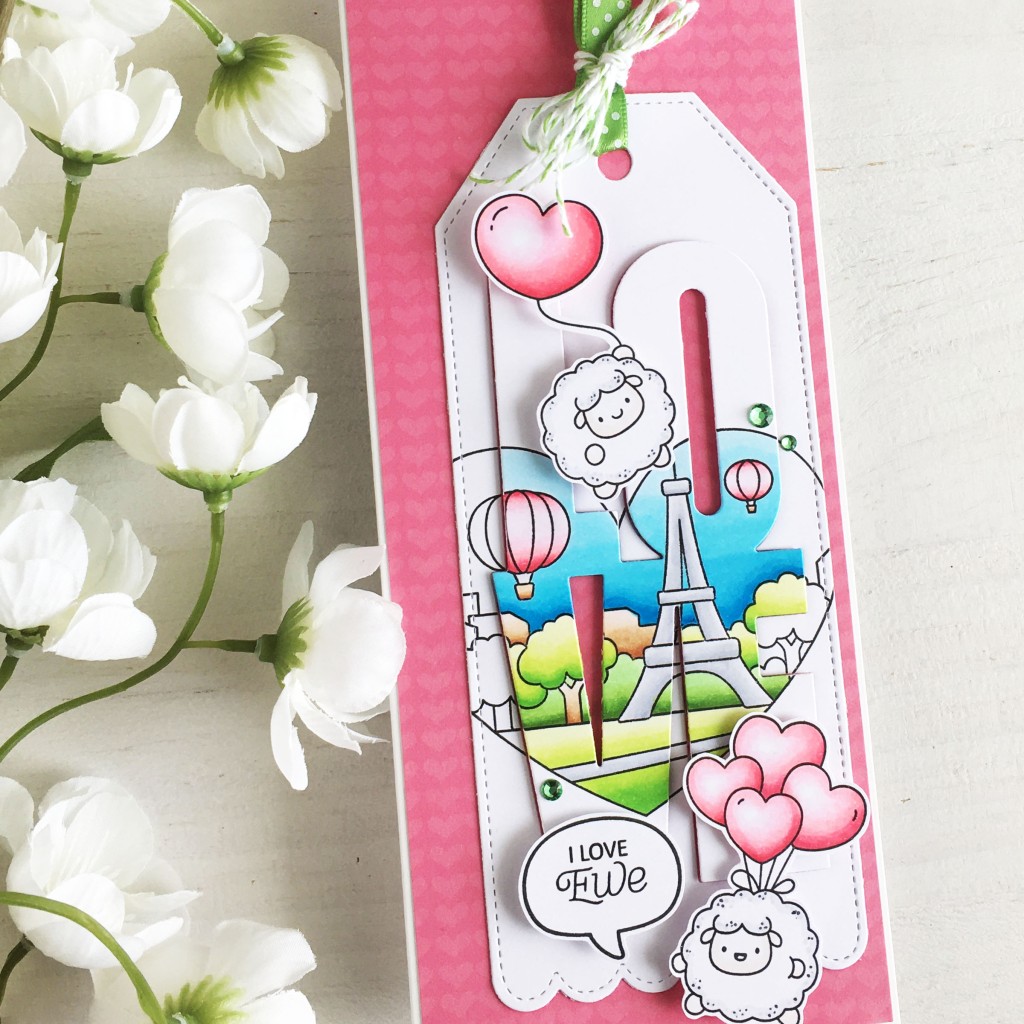
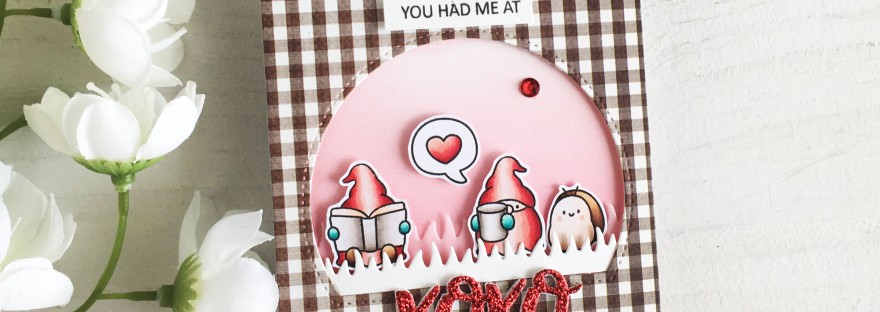
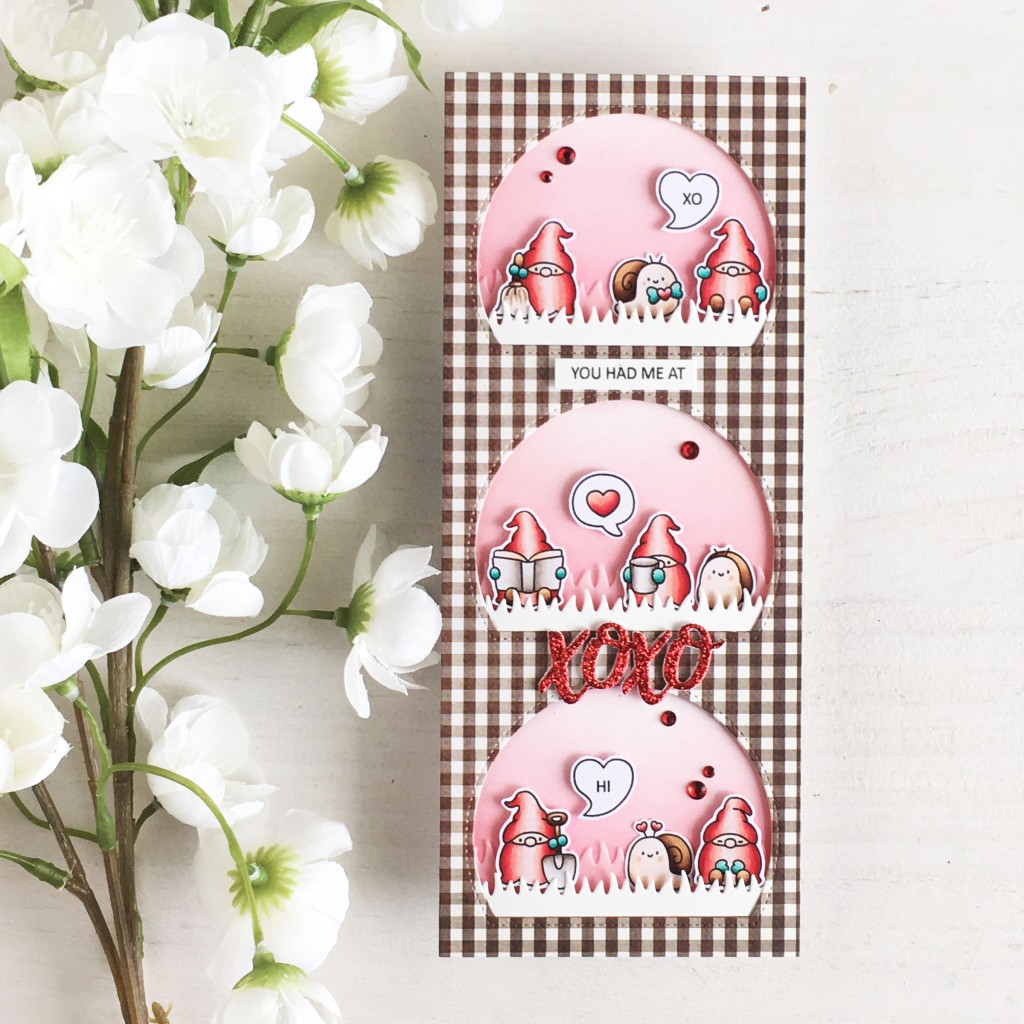
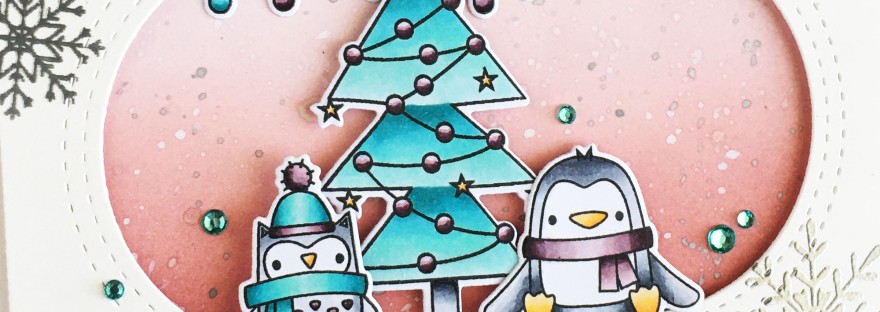
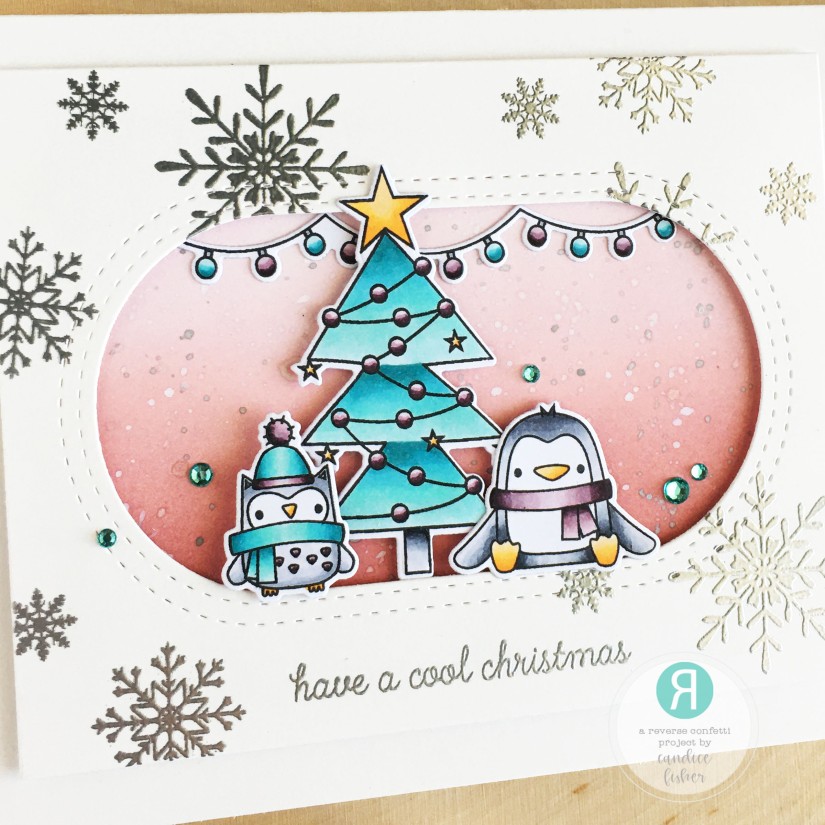
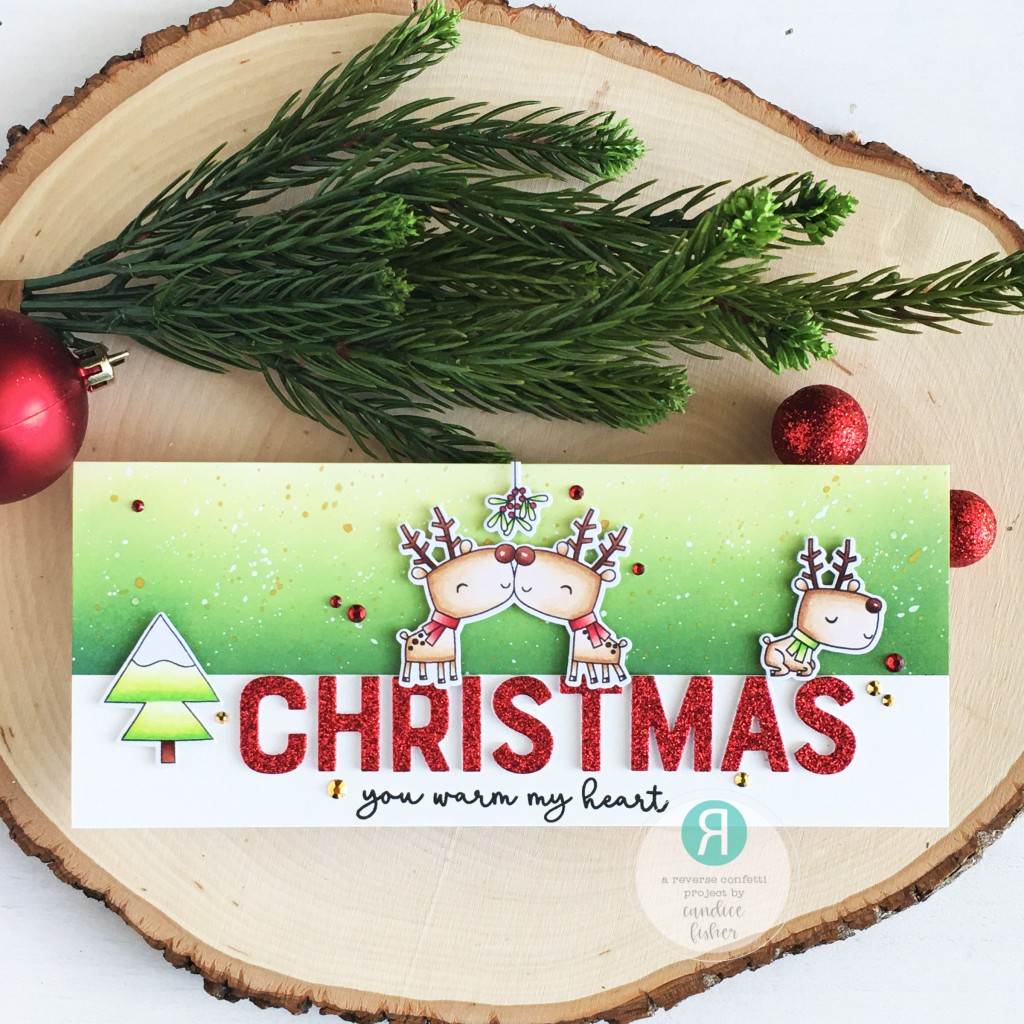
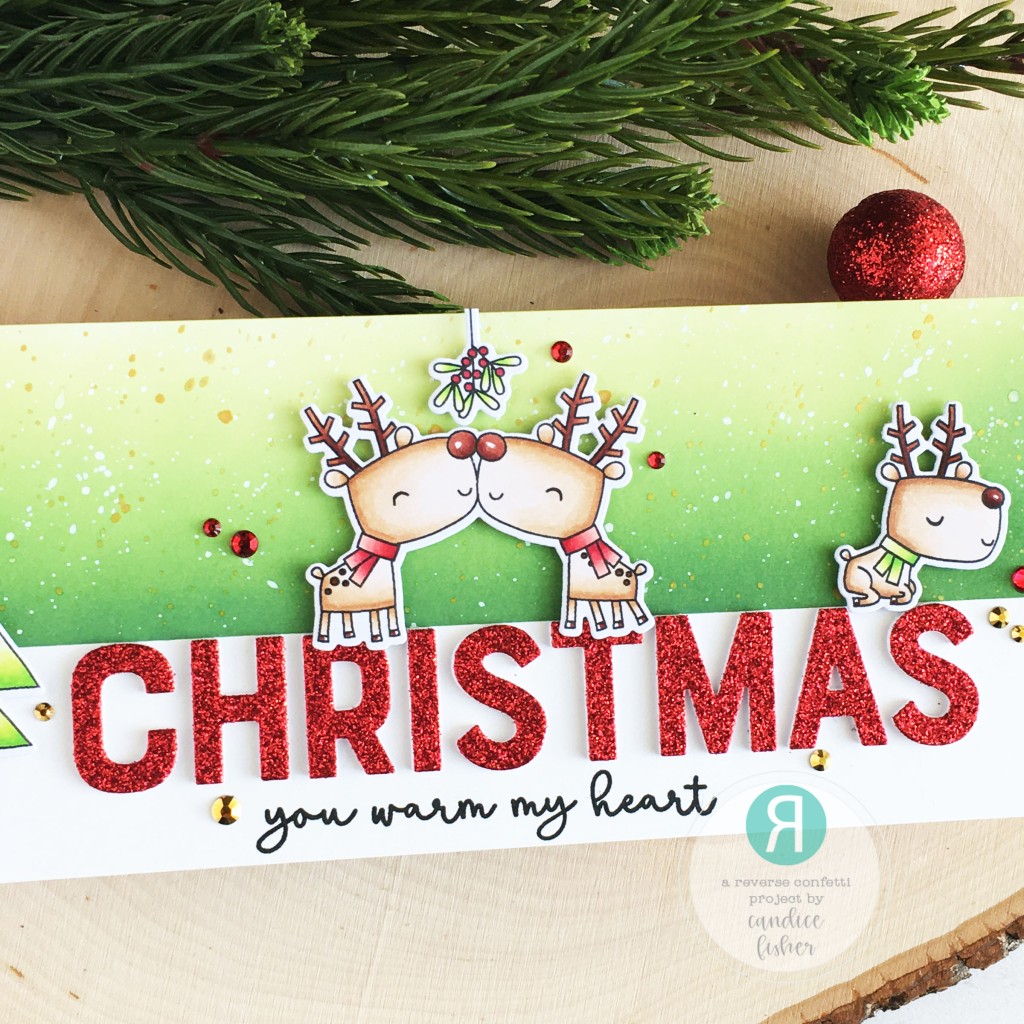
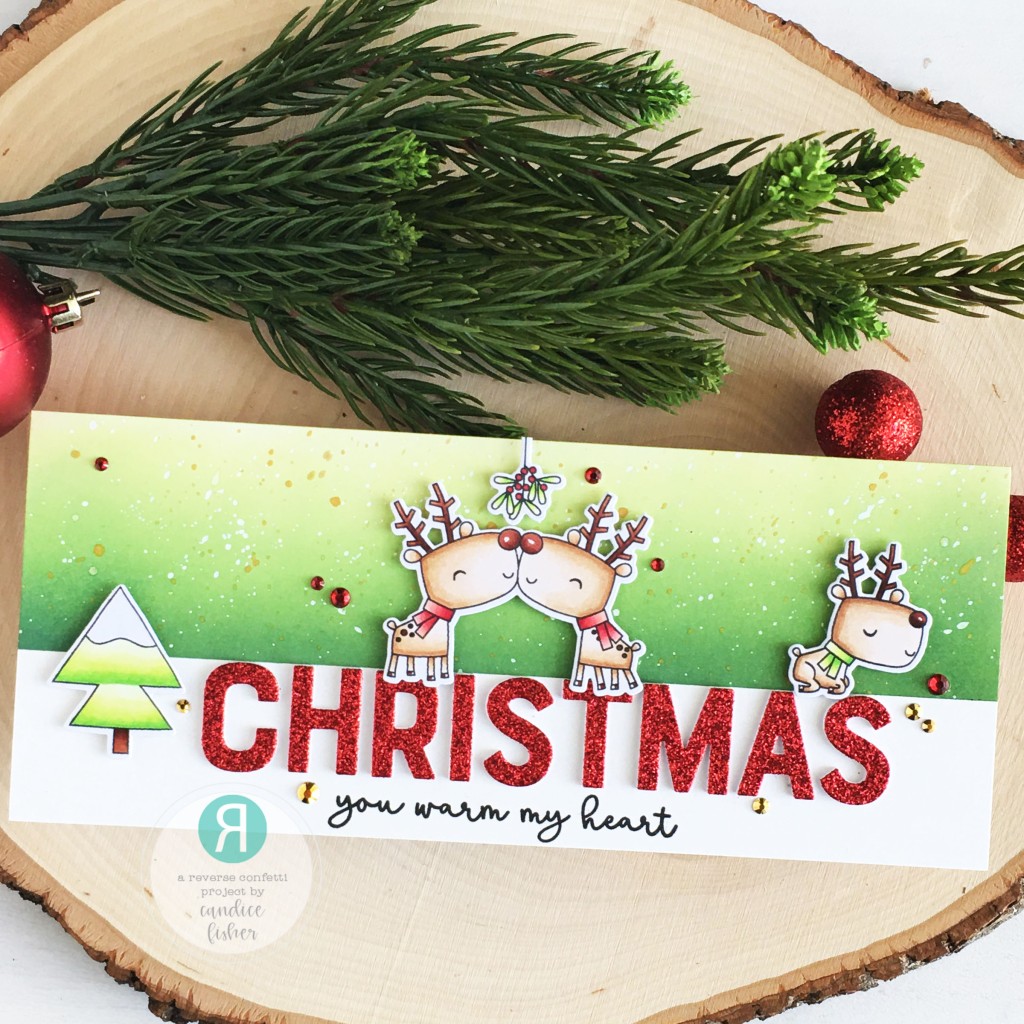
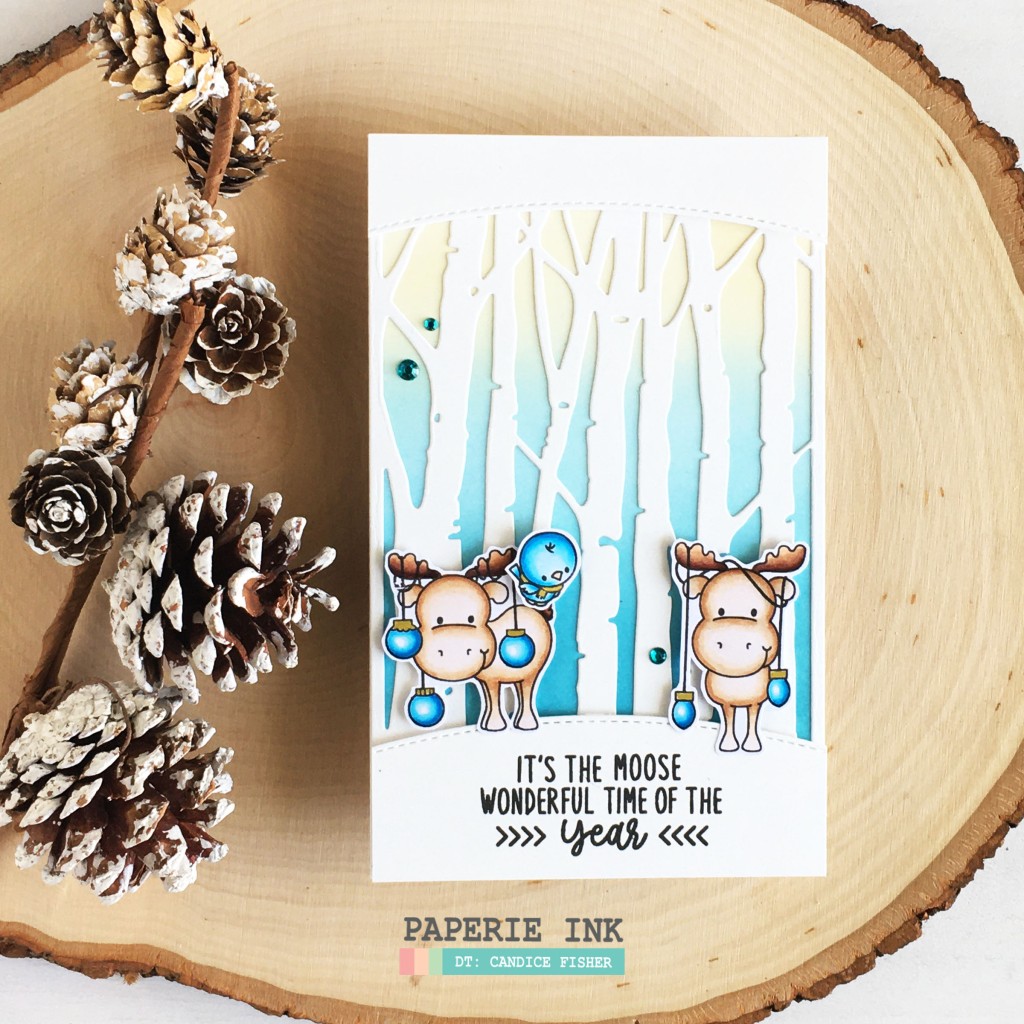
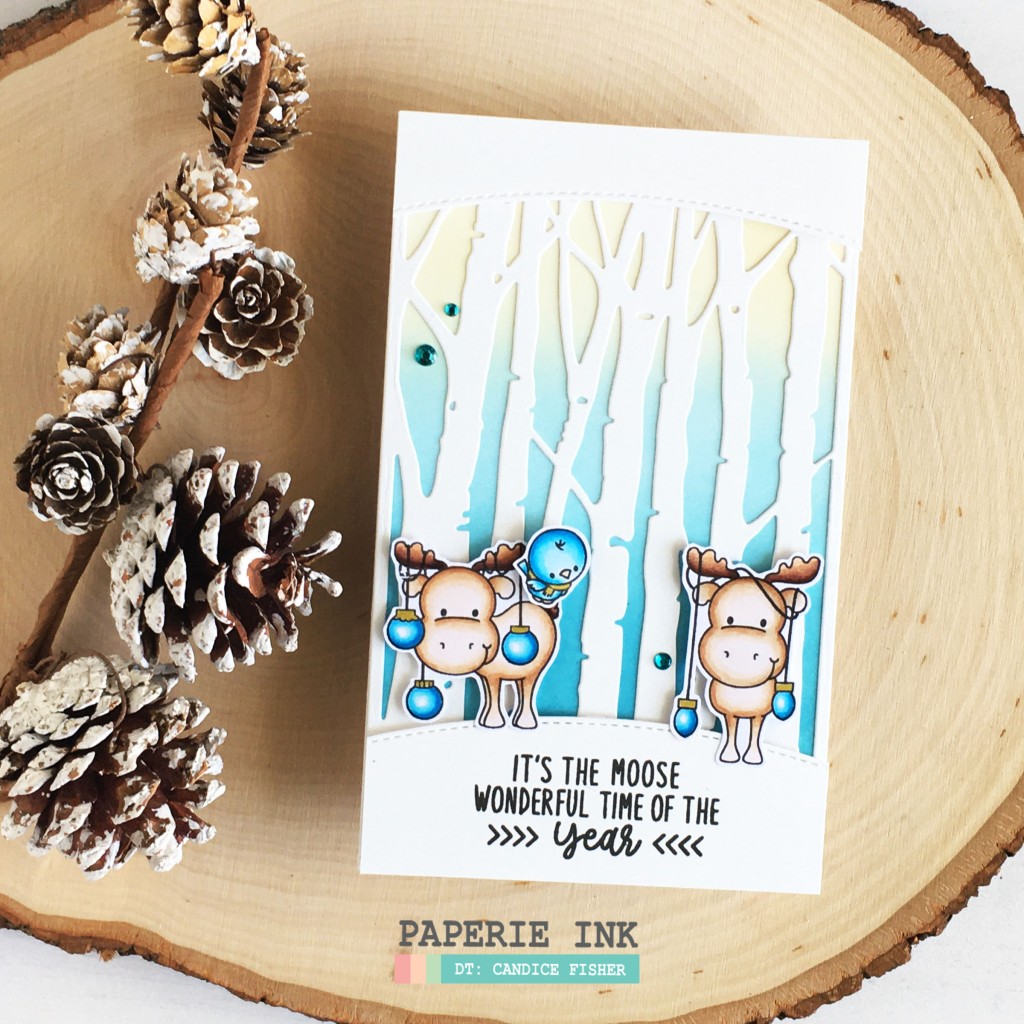
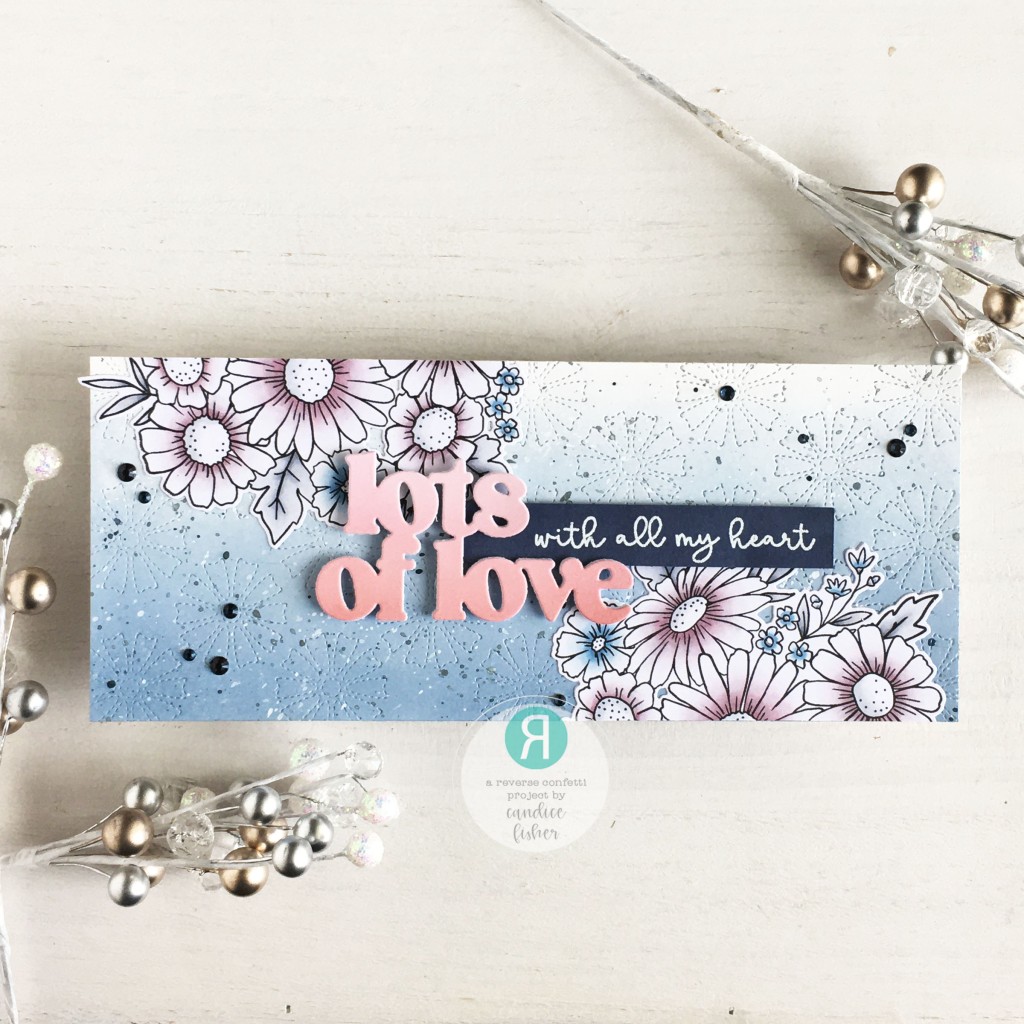
I began my slimline with an 8 1/2 x 3 1/2 card base.
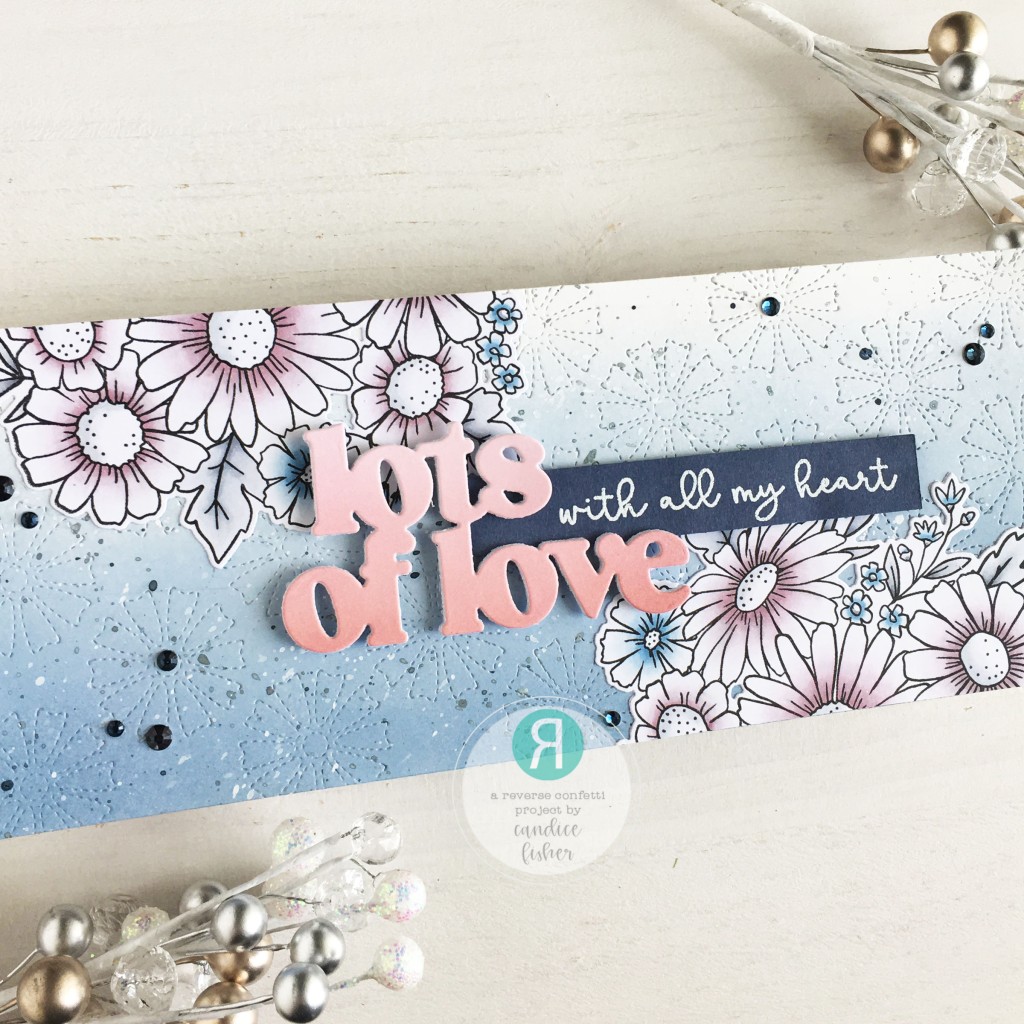
For my background, I trimmed a piece of Bristol Smooth to fit over my card base and die cut the new Stitched Daisies Cover Panel using the partial die cut method (run through partway, rotate and line up, and run through partway again!) I then inked it with stormy sky and splattered with white paint and silver and navy shimmer spray.
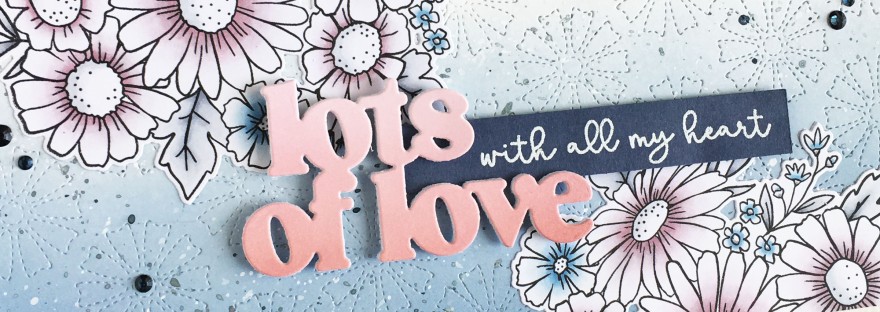
While that dried, I die cut the Lots of Love from an inked piece of Bristol Smooth using aged mahogany, victorian velvet, and milled lavender. I layered with multiples to give a solid sentiment.
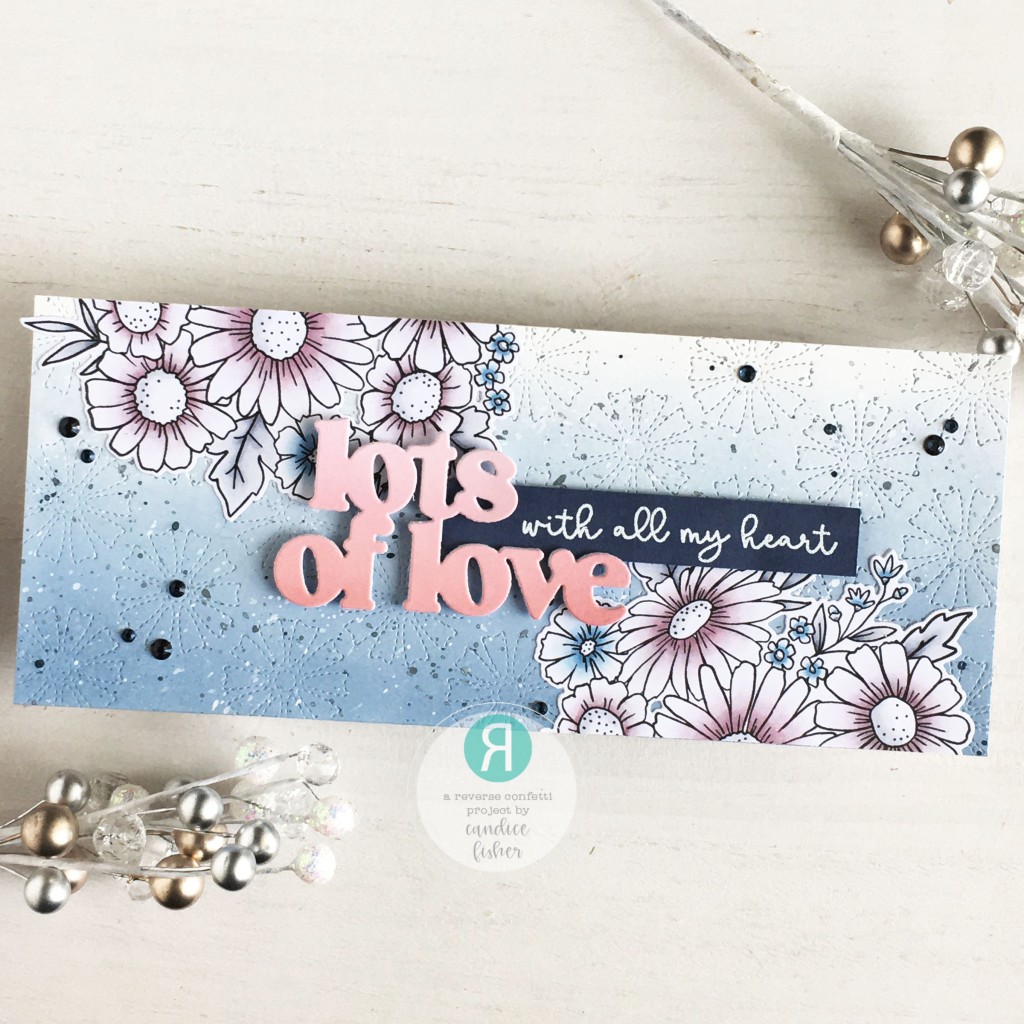
Next, I stamped the daisy cluster, colored it with copic markers, and used the coordinating die to cut it out. I then trimmed it in half gluing a piece to the top and bottom. The sentiment was heat embossed on a navy banner and I adhered it with foam tape and the Lots of Love over it. I fininished with a sprinkling of navy jewels!
You can continue on to Susan Wymer and enjoy the rest of your day!
Thank you for stopping by!
Candice
Candice Fisher (YOU ARE HERE!)